If you’ve been on the fence about whether or not to take your Jeep Cherokee or Grand Cherokee off-roading, then you can comfortably put your mind at ease. With almost 50 years of production history behind the Cherokee line alone, don’t forget that Jeep is the original off-road vehicle manufacturer. It can handle anything that you can throw at it.
Automotive
Rev Up Your Engine with a New Aftermarket Isuzu D-Max Exhaust System
The 3.0L J-series 4-cylinder installed in Isuzu’s D-Max is arguably one of the most reliable commercial engines ever produced. From powerplants for pumping stations, to N-series light duty trucks, they’ve been utilized in almost every application and capacity imaginable.
Improve the Performance of Your Dodge Ram with a Throttle Controller
To keep your pickup truck in good working condition, you must focus on maintaining its parts, especially its engine at a top level. Although this used to be far more difficult, nowadays, it can be easier thanks to many technological advancements that we take for granted. These include the dual-clutch transmission, turbocharging, electronic torque vectoring differentials, a drive-by-wire system and more.
Holden Commodore Throttle Controller Guide: Reduce Throttle Lag and Improve the Response Time
Rivalries form the fabric of Aussie culture. From sporting clashes in different divisions to the longest rivalry in the country’s short history – that between Holden and Ford. The brands are iconic motoring mainstays, that dominated the market for well over half a century. You either drove a Commodore or a Falcon. Anything else was frowned upon.
LED Light Bars: Steps to Choosing the Ideal Light Bar
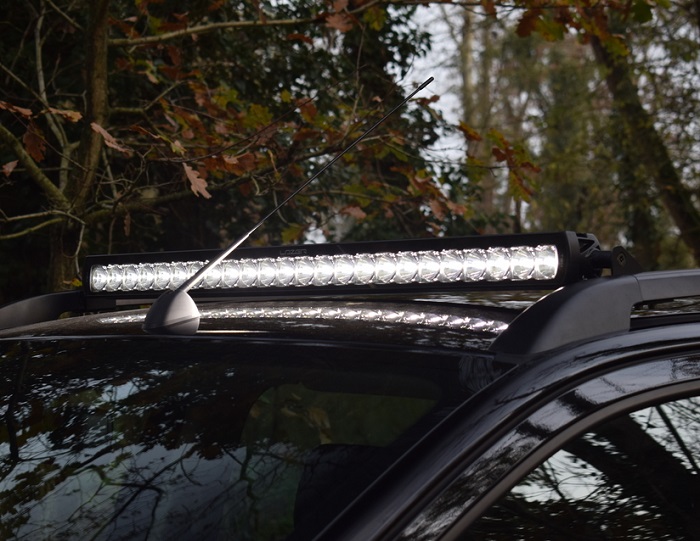
Riding off-road at night can be one of the most exhilarating experiences you’ve ever had. Off-roading by itself is pretty exciting, and going at night can enhance the entire experience. However, just like you need proper illumination in front of you when you drive around town, you’ll need even brighter illumination that can cover a larger distance for off-roading. This is where aftermarket LED light bars come into play. Why LED light bars? Well, LED is the latest lighting technology used on vehicles, and light bars are made specifically for off-road use, as they project a bright, wide beam in front of them. Here’s everything you need to know when you look at all the different LED bar auto products.
First Things First – LED Lighting
As aforementioned, LED technology is the latest technology for car lights. LED stands for light-emitting diode, which is basically a semiconductor projecting lights in the form of electroluminescence with the help of electricity. As complicated as it may sound, these lights have grown in popularity in the past few decades, and you’ll find LEDs everywhere around you, including your home. But what made LED lighting so popular? Well, they’re the most energy-efficient type of lighting, run for over 50.000 hours when compared to conventional halogen bulbs that have a lifespan of around 5.000 hours. In terms of efficiency, LEDs operate at over 80% efficiency, whereas conventional incandescent bulbs operate at only 20% efficiency. In other words, LEDs produce more light using less electricity.
Now that you have a general understanding of the benefits of LEDs, let’s talk about what else you need to look for when shopping for LED bar auto parts.
Steps to Choosing the Right Light Bar
To make sure you choose the right light bar for your off-roader, you must consider all the different features that light bar models come equipped with. Some features may be more important than others, so it’s up to you to decide what matters to you and what doesn’t. This will not only ensure you pick the right product, but it will also ensure you get the most use out of it.
Keep in mind that different states have different laws about LED light bars and how and where you can use them. That being said, do your due diligence and learn what’s allowed and what’s not allowed. This is not only important for avoiding trouble with the law, but ensuring you and everyone else you share the roads with is safe.
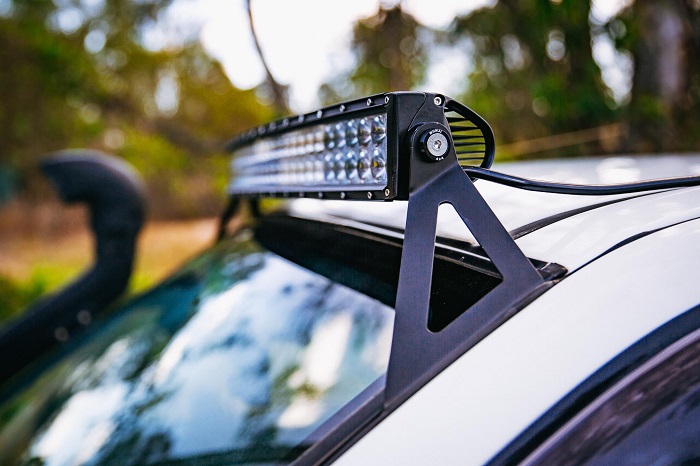
Consider Size
The size of the LED light bars is probably the most important thing to consider when shopping for these products. Why? Simply because the larger the light bar, the more LEDs it will feature, meaning more illumination. Of course, there are exceptions to this rule, because some LEDs can shine brighter than others, so you should also pay attention to the number of lumens the bar is rated to. The size of LED light bars can range anywhere between 10cm to 125cm. It also goes without saying that the larger the light bar, the more expensive it will be.
Consider Shape
The shape of the LED light bar isn’t a significant consideration, but you should still know your options, speaking of which, you only have two – curved and straight LED bars. Their names are pretty self-explanatory, and one doesn’t have advantages over the other, so your choice will come down to personal preference.
Consider the Number of Rows
When it comes to deciding the number of rows you want the LED bar to have, you have only two options as well – single and double row LED bars. It goes without saying that double-row light bars produce more light, but keep in mind that they’ll also be more expensive. Double row LED bars are the more popular choice, but if you aren’t looking for the most illumination, then a single row LED bar might be the better option. Depending on the type of vehicle you have, single row LED light bars may look better than their double row counterparts.
Consider Beam Colour and Pattern
Choosing the beam colour and pattern of a light bar are arguably two of the most significant features to consider. In terms of beam pattern, you’re left with three choices – spot beam, flood beam and a combination beam pattern. But what exactly does the beam pattern do? Simply put, it refers to how wide of a beam the light bar will produce. Spot beam light bars produce a narrow beam that reaches quite far, whereas flood beam patterns provide a wider beam that only illuminates the immediate area. Combination beam patterns, on the other hand, provide the best of both worlds, but at a higher cost.
In terms of light, you can choose between white light, ambient light, as well as green, red or blue colours. White and ambient light are the most popular choices, as the rest are typically reserved for emergency vehicles.
Step Up Your Storage: A Guide to Ute Canopies
If you ask the average ute owner precisely why they own a ute, they’ll very likely tell you it’s because they have just the right mix of power and capacity for taking on so many jobs. But make no mistake, though, having acres of capacity just for capacity’s sake sometimes isn’t enough. That capacity has to serve a real and efficient purpose.
The Whats and the Hows of Auto Carpets
It was the year 1970, vehicles were just starting to gain their traction when it came to implementing the latest automotive trends. One of these trends involved carpet floors which were changing gears and were now being used in cars instead of just your home.
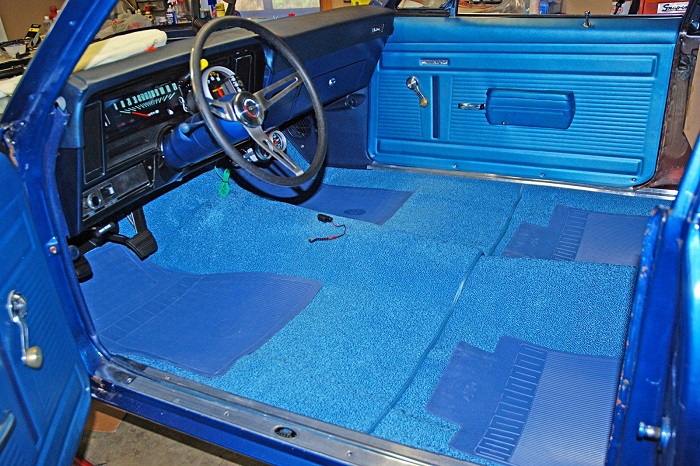
Although in the beginning carpeted vehicle floors seemed a bit odd, as the interior of vehicles changed so did the appeal of automotive carpet. Nowadays we all know how appealing and beneficial car carpets can be. They can help reduce the wear and tear on the original floor whilst minimising noise levels, thus making your vehicle much like your home. Nowadays, soundproofing cars has become a big deal, and installing a proper car carpet plays a big role in it.
Can You Put Any Carpet in a Car?
While it is possible to install many different car carpets in your vehicle not all of them are made the same. Therefore, not every carpet will provide the same qualities. The most versatile and fitting solution here would be a moulded auto interior carpet as it fits the floor of your vehicle best since it’s made especially for it.
Installation Process
Prepare
But if you decided to go for a different type, then you’ll need to prepare your vehicle for the installation process. This will involve cleaning your vehicle thoroughly. You should use a stiff wire brush on any rust spots together with a mild solvent. Either vacuum or sweep the floor and then get ready to start removing the old vehicle carpet.
Remove
1. To remove the old carpet you need to first unplug the battery terminals and remove the front seats. With that done you will then also need to remove the kick panels, shifter, console, trim panels, and in some vehicles even the belts too.
2. With all those parts removed from the vehicles, check your current carpet for holes designated for the mounting of the parts you just removed. Mark those holes for future reference and then start removing the old carpet.
3. While removing the old car carpet be careful not to remove the body insulation found on the floor. This, alongside the catalytic converter shield, is needed. With the carpet removed, sweep or vacuum the floor for any debris left from the removal.
Install
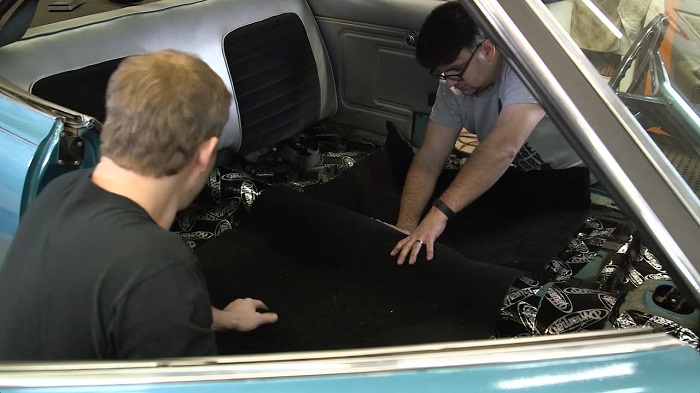
1. To install the new vehicle carpet, first, lay out pieces of it inside and mark the shapes using chalk. Once you’ve done that cut the carpet following the marked shape. Make sure to start out in the middle and then make your last cuts on the outside edges.
2. Always install the cut carpet as you go, meaning when you install one piece of carpet and then install the component near or in the middle of it. Using a sharp knife for the cuts is essential here as it will make for a safer experience and one that will allow you to spend as little time as possible when cutting the carpet.
3. With all the pieces cut and all the holes made into the cut pieces start installing the new auto interior carpet. Make sure that every piece of it fits its area snugly and that no excess material is present. In case there is some excess material on a certain piece, trim it off using a pair of scissors. Don’t use a knife for this.
4. Once you’ve placed all the carpet and put everything in place, give your car one last sweep or vacuuming and you’re done. Make sure when you put the shifter back on it works the way it should since if you install it incorrectly it can wreak havoc on your transmission.
Tips on Keeping your Car Carpet Clean
Vacuum
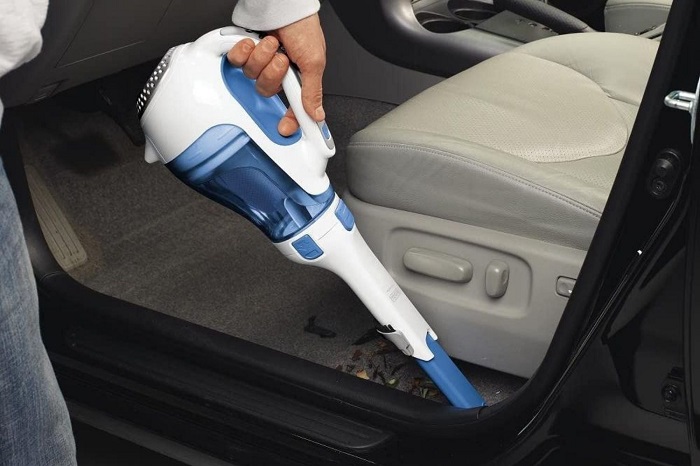
Just as you would keep your motorcycle clean you’ll also want to keep the inside of your car clean. The most important task you need to do regularly in order to keep your ideal auto interior carpet in good shape is to vacuum it. Even if you have a “no food” rule in your car, all kinds of debris from your shoes can end up on the floor. So, vacuuming it even for two minutes will make a big difference in how the inside of your car smells and looks.
Treating Stains
If you happen to have some stains on the carpet then you should revert to a more thorough cleaning. Treating stains is done with hot water, dish detergent, and a cup of white vinegar. This homemade combination is the best DIY solution for the removal of stains from your car’s carpet floor. That is if the stain is a recent one and not a spot that you’ve been eyeing for months. Just rub in the mixture and then let it sit for about 30 minutes before you blot the spot with cotton cloths until you dry it off.
Use Paper
Vacuuming can sometimes be inefficient when it comes to removing odours from the carpet in your vehicle. This is where you can use a preventative measure to get rid of foul smells and stubborn stains. Placing a paper towel in the footwell will help absorb some of the nasty particles that can cause both, and save you lots of time cleaning the carpet afterwards.
RC Hobby: Steps to Getting the Right Motorbike Model

If you like adrenaline, strategizing and spending fun quality time with friends and family – RC hobbies are perfect for you. These are fun activities that allow people to come together and enjoy driving and racing with high-performance radio-controlled vehicles. RC vehicles such as cars, bikes, trucks and others are much more than toys. They’re extremely popular as a hobby, but a lot of people also collect and invest in them to participate in different racing shows. They give you a fun and thrilling time but also an opportunity to earn easy cash prizes.
How Do RC Motorcycle Models Work?
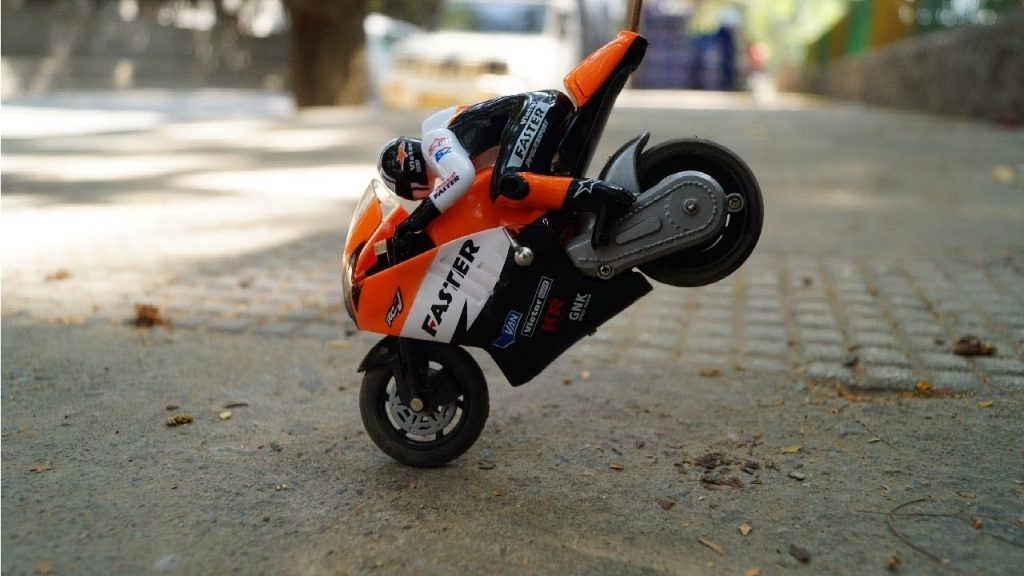
RC motorcycles are popular RC vehicles that are seeing a huge demand in recent years. There is one question on everyone’s mind when they first see these vehicles – How do RC motorbikes stay upright? Some motorcycle scale models have little stands that help to keep them upright (similar to training wheels). However, other models have an auto-balance feature that keeps them upright by slightly moving the tires when the bike is standing still.
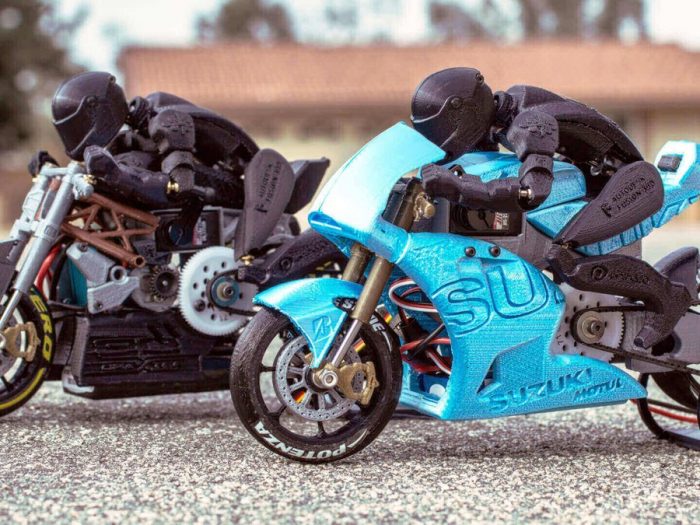
RC motorbike models are versatile and contain a lot of intricate details, making them look like exact replicas of the life-sized models. They also come with various paints that allow you to customize them according to your preferences. RC scale model motorbikes work on the same principles as normal motorcycles and RC cars. They’re able to stay upright with forward momentum, much like traditional bikes. It’s good to note that, while RC cars can go on any type of terrain, RC bikes can only go on smoother terrains (such as pavements). This is because bumps or rough areas in the road can easily cause them to turn over.
These scale bikes come in special model motorcycle kits. Building a model bike is much like building a model car. You need to put together the various steering, arm connection parts, spring, crash bar, tires and other parts that are marked with numbers to make your building process easier.
Nitro vs Electric RC Bikes
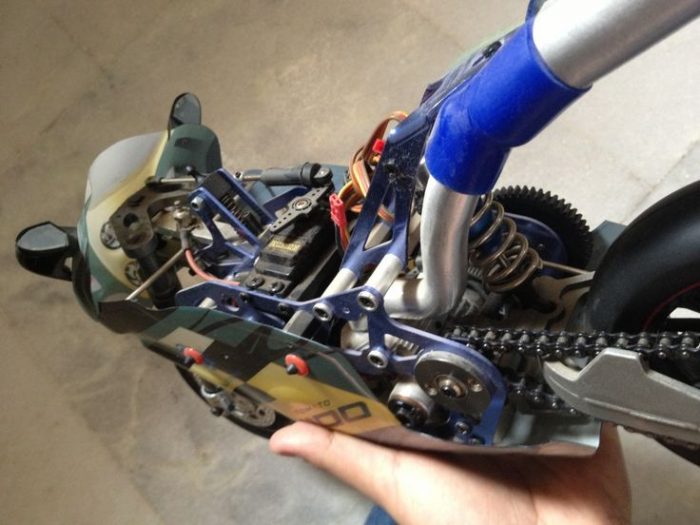
RC bikes can be powered either by batteries or nitro fuel. These two types have significant differences. The biggest difference is what makes them go. The electric model bike uses a motor that requires electricity (in the form of a battery pack). On the other hand, the nitro bike uses an engine that runs on methanol-based fuel. This fuel contains nitromethane. Nitro fuel is the equivalent of the gasoline that is used in a full-sized car or truck. Some lesser-known RC bikes even have gas-powered engines that use gasoline instead of nitro fuel. These are significantly larger and less used than the electric and nitro models.
Brushed vs Brushless Electric Motors
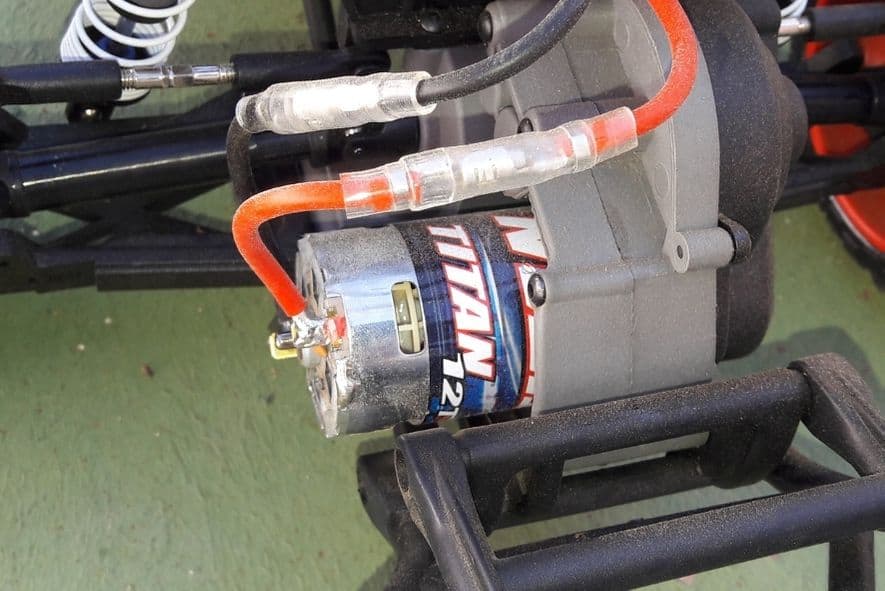
When it comes to electric motors, two types are used among RC hobby enthusiasts – brushed and brushless motors.
The brushed electric motor is the only one you can find in toy-grade and beginner RC bikes; however, it’s also used for other hobby-grade models. The name derives from the way this motor functions. These motors contain small contact brushes that allow them to spin. They can be either fixed or nonfixed. Fixed motors are nonadjustable and can’t be modified or tuned. On the other hand, nonfixed brushed motors have replaceable brushes and can be modified and tuned to some degree. They are easy to clean from dust and debris that tends to accumulate from use.
Brushless motors are becoming increasingly popular in the RC hobby world. These are considered premium compared to brushed motors. They give much more power and speed. These motors don’t contain contact brushes so they don’t require frequent cleaning. This also results in less friction and heat, which pose the biggest problems in motor performance. Brushless motors are mostly favoured for the speed they provide. They’re faster than brushed and nitro motors.
Nitro Engines
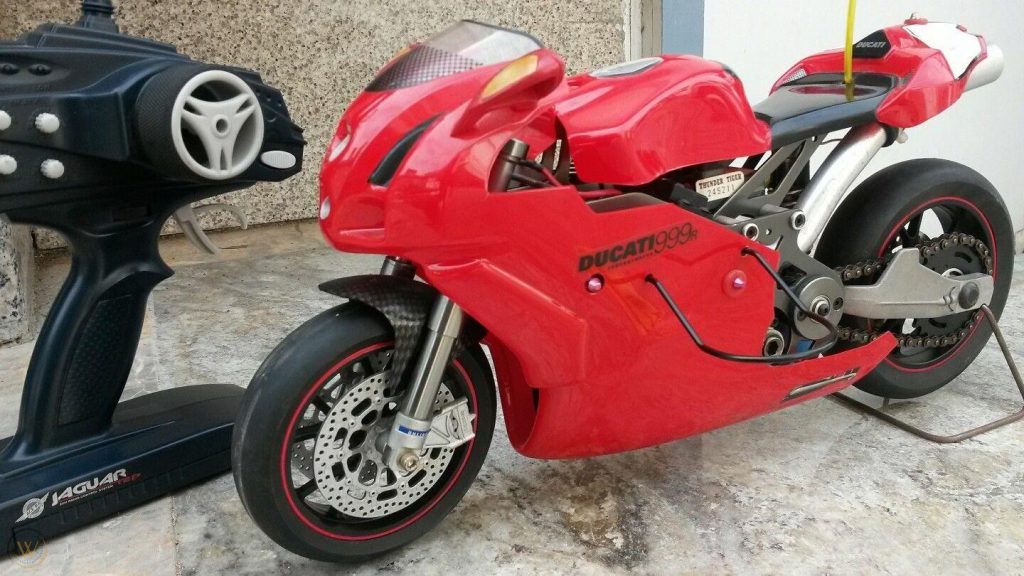
Nitro engines have a completely different construction from electric motors. They have carburettors, flywheels, air filters, pistons, clutches, glow plugs and crankshafts, resembling full-sized gasoline-powered vehicles. They also have a fuel system with a fuel tank and exhaust. The main part of a nitro engine that dissipates heat from the engine block is the head heatsink. You can regulate the temperature on these engines by turning the carburettors, which lessens or increases the amount of fuel that’s being used.
Types of Frames
The frame in RC bikes (also called chassis) can be made from either plastic or aluminium. Hobby-grade RC vehicles are made from high-quality premium plastic. The other components attached to the chassis are often made from carbon fibre, which reduces the overall weight of the vehicle.
RCs with nitro engines usually have a metal chassis made from anodized aluminium. This kind of frame is ideal because of its heat-reducing properties, as the nitro engine releases a lot of heat.
Are Electric RC Bikes Better Than Nitro RC Bikes?
That said, you’re probably wondering what type of RC is the ideal choice. The answer to this question partly depends on your own personal preference. However, a lot of hobbyists recommend the RC motorbike models with an electric motor. While nitro bikes require fuel, electric models conveniently run on a battery pack. Electric RCs also require fewer parts to build, which means that putting one together is easier than building a nitro RC. They’re more lightweight due to their light aluminium frames, while the nitro-powered RCs are significantly heavier.
Maintenance
Both nitro and electric RCs require regular maintenance to keep them in shape. This includes regular cleaning, checking the tires, replacing shocks and bearings, tightening loose screws and more. While a nitro engine needs to go through an engine break-in to avoid repairs down the road, an electric RC only needs to have its battery frequently charged. An electric RC is much easier to use and maintain, as you only need to make small brake and throttle linking adjustments. For a nitro RC, you need to go through some after-run maintenance, such as draining the fuel tank, cleaning the air filter, adding after-burn oil etc., while this isn’t necessary for an electric RC.
Step Up Protection: How to Choose the Right Caravan Cover
I think we can all agree that camping is a great activity for the entire family. But once you’re done exploring Mother Nature and get back home, you probably know how important it is to keep your caravan away from dirt, tree sap, bird droppings, rain and any other damages that can occur. But truth be told, not all of us are lucky to have a spacious garage or suitable extension for keeping our caravans protected, and this is the moment when covers for caravans come in.
Everything You Need to Know About Electrical Systems in Caravans
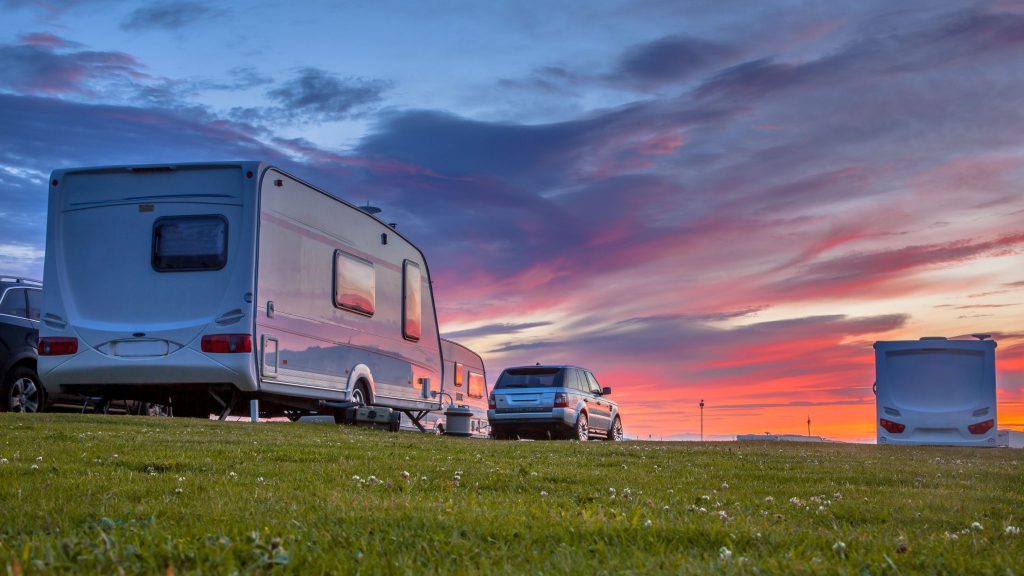
Despite stagnating sales figures in new passenger cars, the number of caravans and campervans is on the rise. Recent findings show that over 700 thousand such registered vehicles roam the Australian vastness. If you’re one of the lucky owners, you’ll know that like all vehicles, caravans, motorhomes and campervans need regular maintenance and checks, especially before starting that long-planned endeavour of exploring our country. One area of particular importance is checking the caravan electrics, to ensure that everything is in working order and that you’ll be able to safely use all appliances and devices you take with you.
Caravan Electrics – The Basics
Caravans outnumber campervans by ten to one. One reason is the lower cost, and that most are bought as second-hand options. Checking for any signs of wear, like frayed cables or battery leakage, might mean you need to do some upfront maintenance, but safety is your priority here. Also, you don’t want to be stuck hundreds of kilometres from the next town without properly installed and wired caravan electrics.
Campervans tend to have all the electrics pre-installed, either in hidden recesses along the walls or in the roofline. Most will also have space for bigger appliances like fridges and microwaves that use higher voltage 240V AC current. Newer models are integrated units, meaning all electrics are taken care of. You just need to start the engine for your next adventure.
The basic distinction here is between 12 DC currents being fed by batteries and 240 AC currents that are usually the norm in newer, but typically more expensive campervans or motorhomes. What do the two different types of power delivery mean for you and the appliances you can use?
240 Volt systems
240 Volts systems use mains power, like the type you get in your home. This means that appliances that use a lot of power in cooling, heating and cooking can work properly. Aircons, stoves and fridges are found in many newer recreational vehicles but need heaps of AC power to work. If you’ve set up in a camp park, then this should not be a problem. Most throughout Australia will have mains connections that you can hook up to your vehicle or trailer. To get power to your caravan or campervan in a campsite, use the hook up cable. Make sure the isolating switches or breakers are turned off before plugging in. Connect to the correct socket type with the amperage of your hook up cable. When that’s taken care of, turn on the outlet isolators and you’re done.
If you have a combined AC and DC electrical system, then a mains charger with a connected Anderson plug is used to replenish power in used batteries.
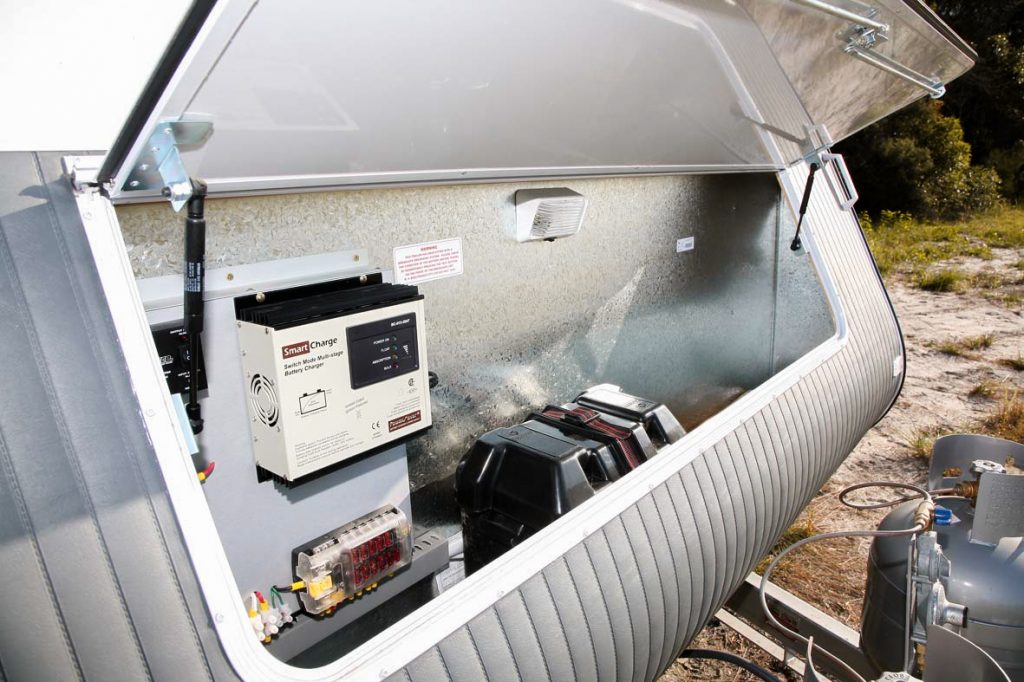
12/24 Volt Systems
Battery or 12 Volt systems are the ones used for most camping purposes. This will include a separate deep cycle battery in the caravan or campervan to feed the 12V DC current to smaller appliances and equipment. This includes all types of lights that you use both inside and outside. LED awning and sidelights to light areas besides your caravan when the sun sets, or smaller reading lamps inside. Taillights in different combinations, like pairs or led strips with separate amber and yellow lights can be fitted to new vehicles or retrofitted into older ones. Compatible switches are easily wired and connected. Lights use low wattage, so shouldn’t drain much battery power.
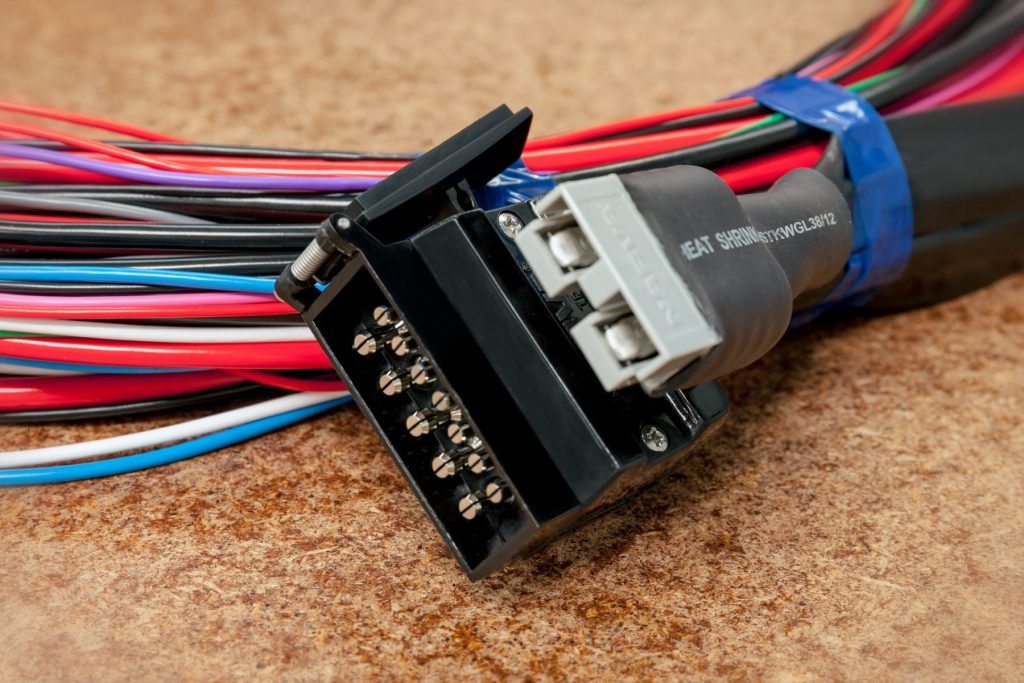
To use other devices, like small portable fridges, radios, TVs, signal boosters, portable fans, power banks and more you’ll need suitable USB inputs that connect by way of Anderson plugs directly to the battery or in the battery box inputs. Outlets with the right amperage are used in 240V systems for the bigger stuff.
Powering Batteries
Most campervans and caravans are moving toward solar power, as a backup solution in battery charging. Different types of panels are sold. From traditional rooftop panels to smaller and thinner flexible panels. If you’re fitting new panels to your vehicle, consider how much power you need and if you intend to use more power-hungry appliances at once. Solar professionals will help you install the right type of solar setup, with leverage for future upgrades.
Besides using mains chargers or panels, a good idea would be to get a trickle charger, to charge batteries overnight. Or, you can use a DC-DC charger to charge the caravan battery using your car’s starter motor. Get a battery monitor to show how much juice you have left, and whether you’re charging the batteries properly.
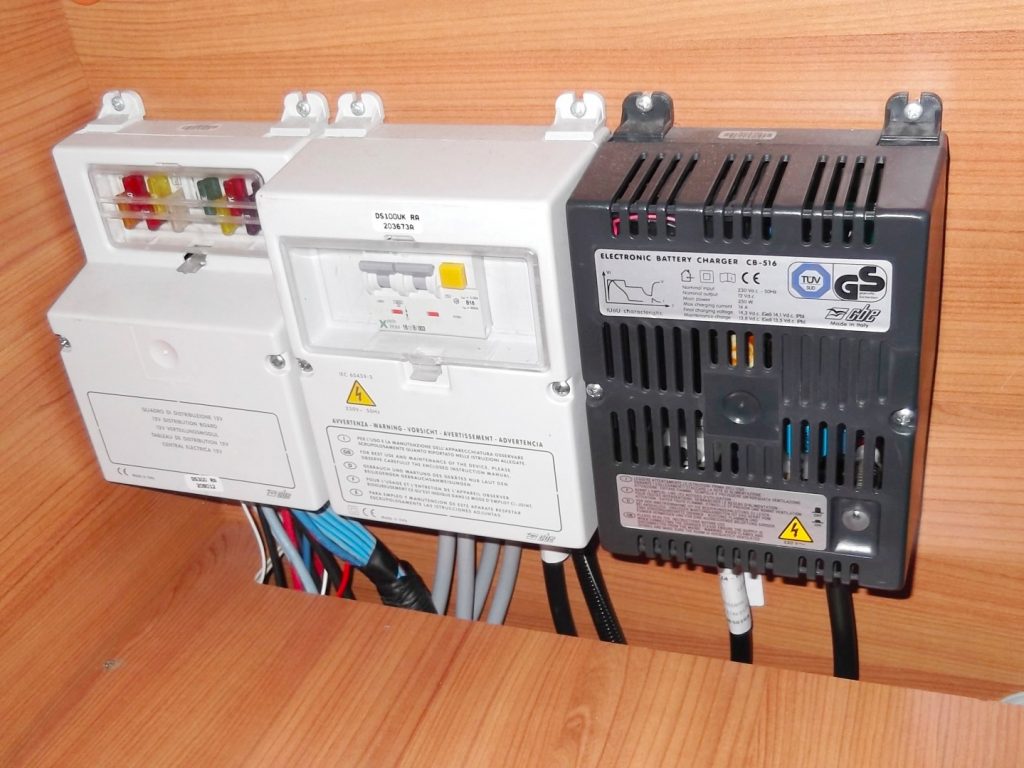
In all cases, safety is your top concern, especially with kids, or when the weather turns bad. Everything in caravan electrics needs to be properly connected and insulated. Surge protectors, fuses and breaker boxes will keep the risks of shocks or electrical fires at bay. And any expensive gear will be protected. You’ll also avoid the embarrassment of causing power outages at the campsite.
Buying and Installing Caravan Electrics
You can find basic caravan and campervan electrical wiring and equipment, different chargers, batteries and battery boxes in most camping stores tailoring to 4WDs and larger vehicles. This is where to look for lighting and general cooking gear. For panels, your best bet is having a pro fit with panels from dedicated camping solar stores. As for camping devices and gadgets, online stores sell heaps of stuff.
RECENT POSTS

